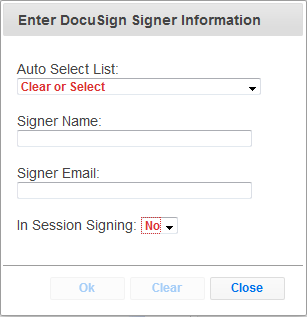
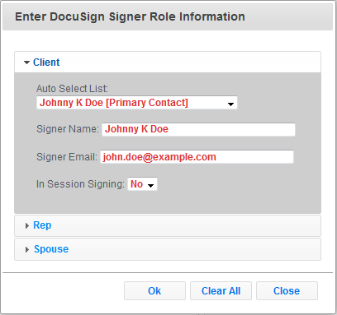
The dialog displayed will depend upon whether the form's signatures have been designated to a role.
Enter the following fields:
Auto Select List - toggle this box to quickly select from the primary contact and any assigned beneficiaries or related individuals.
User Name - the full legal name of the signer.
User Email - the email address of the signer. Notifications to sign will be sent here unless in session signing is toggled later.
Phone Authentication - depending on the authentication options set by your administrator, you may be required or allowed to enter a phone number for phone based authentication during the signing process.
Access Code - depending on the authentication options set by your administrator, you may be required or allowed to enter an access code for authentication during the signing process.
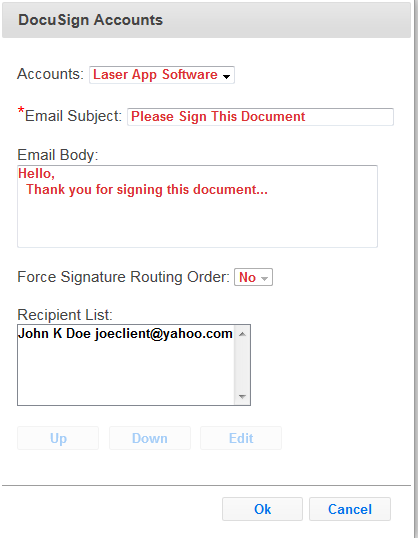
Accounts - if your DocuSign account has multiple sub-accounts you can toggle the proper one from this box.
Email Subject - the required Email subject line for recipients receiving confirmation via email.
Email Body - The main body of the email message going out to all recipients with email confirmations.
Force Signature Routing Order - if more than one recipient is present (and in-process signing is not used as an option) this will send confirmation emails from top to bottom in the Recipient List. Recipients will not receive an email from DocuSign until the previous recipient has completed the signing process. Ordering can be changed using the Up and Down buttons.
Further recipient level options may be set by selecting the recipient and clicking the Edit button to reveal the DocuSign Recipient dialog:
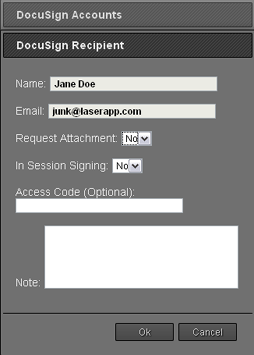
Request Attachment - toggle this to prompt the user for an upload file following their signature process.
In Session Signing - toggle this if the recipient/signer is physically present and ready to sign with the current device/browser. Note: the user will not receive an email notification until signing is complete with this option.
Access Code - Optionally enter this value and the user will be prompted for it prior to signing.
Note - enter any notes to this specific recipient to display at the beginning of the signing ceremony.
Note: If any of the recipients were set to "In-Process" signing you will see a final dialog with a link for each user to complete the process. It is very important that all signers complete the signing before closing this dialog.